 Reviews


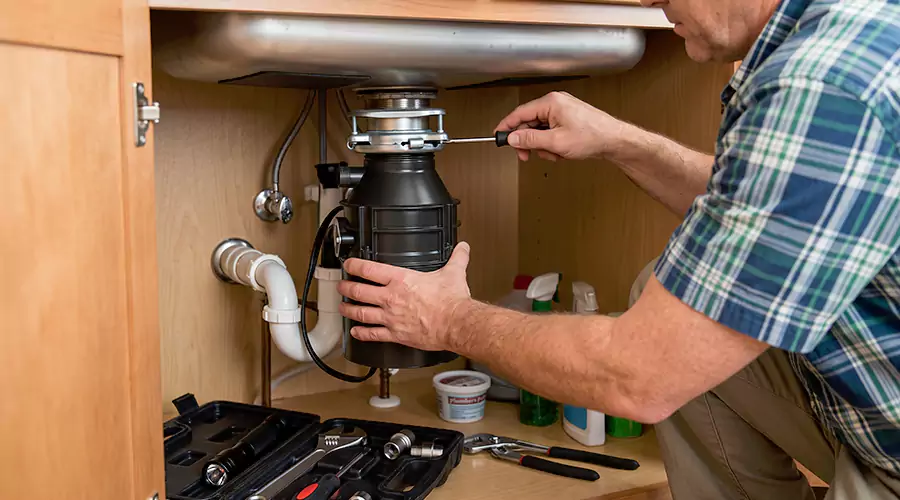
A garbage disposal installation needs about eight hand tools plus $15 in sealing supplies. Most homeowners already own everything except the plumber's putty. The unit itself costs $75 to $200 and the labor is free when the hands are yours.
No specialty equipment enters the job. The disposal ships with its own mounting hardware and even its own little wrench.
The full checklist sits below along with the buying decisions that trip up first-timers. Read the pre-purchase section before the store trip because two wrong assumptions cause most returns.
The Tools You Need
Eight tools cover the entire job from teardown to leak test. The most common required tools are a hammer with screwdrivers plus a putty knife and safety glasses and a small bucket. Here's the full kit with each tool's job:
- Phillips and flathead screwdrivers: These tighten the mounting bracket screws and handle the electrical cover.
- Adjustable wrench or channel-lock pliers: These grip and turn the plumbing nuts and fittings under the sink.
- Hammer: It taps out the dishwasher knockout plug with a screwdriver as the punch.
- Putty knife: It scrapes old putty and sealant off the sink.
- Hacksaw: It trims a discharge tube that runs too long.
- Flashlight or headlamp: The under-sink cavity is dark exactly where the work happens.
- Voltage tester: It proves the circuit is dead before any wiring work.
- Bucket and towels: The P-trap holds water that lands somewhere when opened.
Insider Tip: Wear the safety glasses for the knockout step specifically. The plastic plug breaks free with a snap and the pieces fly.
Materials and Parts
Four consumables complete the shopping list beyond the unit itself. Together they cost under $20. Two of them prevent the leaks that define a bad install.
- Plumber's putty: Use only the non-hardening type for the sink flange. Avoid silicone caulk here because putty creates a better removable seal.
- Power cord kit: A hardwired model needs a separate cord kit to become a plug-in unit. Check the box before leaving the store.
- Wire nuts and a cable connector: The electrical hookup uses wire nuts with a clamp-style connector on cord-kit installs.
- A new discharge fitting: Old drain tubes rarely line up with new outlets. A fresh tube costs a few dollars and saves a second trip, making drain services easier to complete efficiently.
The disposal box supplies the rest. The flange assembly comes packed with the fiber gasket and the mounting ring and the snap ring.
Check These Four Things Before Buying
Four pre-purchase checks prevent the classic day-one surprises. Each takes under two minutes at home. Skipping them is how a Saturday project becomes a Sunday return line.
- Power type: Look under the sink for an outlet. No outlet means a hardwired setup or an electrician visit. Waste disposer installation rules in many areas also require a GFCI-protected dedicated circuit.
- Switch location: Food disposal installation needs a wall switch within easy reach of the sink. A missing switch is electrician work before anything mounts.
- Horsepower: One-half to three-fourths HP covers the average household. Bigger motors mostly buy quieter grinding.
- Sink opening: Sink drains run a standard 3.5 to 4 inches. To install waste disposal unit hardware in an unusual or antique sink you may need a specialty flange.
Insider Tip: Photograph your under-sink plumbing and the outlet before shopping. The photo answers half the questions a store associate will ask.
Disposal Installation Step by Step
Every disposal installation follows the same mounting sequence regardless of brand. The flange seats from above and everything else builds from below. Budget an afternoon for a first attempt.
- Seal the flange: Roll a half-inch rope of putty around the drain opening and press the new flange into place. Setting the disposal on top as a weight holds the flange while you work below. Put a towel down first.
- Build the stack underneath: Slide the fiber gasket and then the backup flange and then the mounting ring onto the flange stem in that order. Tighten the screws by alternating sides for even pressure and stop at snug.
- Open the dishwasher port if needed: The garbage disposal repair setup includes the knockout decision. Tap out the plastic plug with a screwdriver and hammer only when a dishwasher drains through the unit. Shake the loose piece out of the chamber afterward.
- Wire before mounting: A hardwired unit gets its electrical work completed before it hangs. Corded units skip straight ahead.
- Hang the unit: This is the heavy moment of installing food disposal unit hardware. Get assistance for the lift because the unit is heavy and installing a disposal unit goes far more smoothly with a second set of hands. You attach garbage disposal bodies with a twist-lock. Align the tabs with the mounting ring and rotate clockwise until it clicks solid.
- Connect the drain: Garbage disposal plumbing runs from the side outlet to the trap. Fit the gasket and discharge elbow and then connect the tube to the P-trap. Hand-tighten the slip nuts first and then snug them gently without overtightening plastic.
- Test wet: Open the faucet and check every connection for leaks before plugging in.
Insider Tip: Tighten the mounting screws in a star pattern the way you'd torque a wheel. Even pressure squeezes the putty into a perfect ring instead of one thick side.
Replacing vs First-Time Installs
A replacement reuses the wiring and often the mounting hardware. A first-time install adds electrical work and sometimes a permit. Knowing which project you have sets the honest budget.
Replacements start with a teardown. Loosen the three mounting screws and pry off the snap ring to drop the old assembly. Then scrape every trace of old putty off the sink opening before the new flange seats. Same-brand swaps sometimes keep the existing mounting ring entirely.
First-time installs carry the extra scope. A sink without an outlet and switch needs a licensed electrician and possibly a permit. Canadian readers know the identical project as garburator installation and the steps never change across the border.
What the Project Costs in 2026?
The DIY path costs the unit plus about $20 in supplies. Professional labor adds a predictable premium. The table shows every realistic 2026 path.
| Path | 2026 cost |
|---|---|
| DIY with your own unit | $75 to $200 plus supplies |
| Store unit plus flat-rate labor | Labor averages $189 when bundled as garbage disposal and installation |
| Full pro replacement | $200 to $550 with most paying $300 to $450 |
| New circuit by electrician | Quoted separately |
Time is the other budget. A first-time garbage disposal unit installation fills an afternoon while a pro finishes a standard swap in about an hour.
When to Call a Professional
Three findings move this project to a licensed electrician. Each involves the electrical side rather than the plumbing side. The mounting work itself stays DIY-friendly in almost every kitchen.
- No existing outlet or switch: A licensed electrician handles the new circuit and can confirm whether a permit is required.
- Aluminum or degraded wiring: Old wire under a wet sink deserves professional eyes.
- A hardwired setup you're unsure about: The cord kit conversion is simple but only when the breaker labeling is trustworthy.
Plumbing-side help stays cheap by comparison. A pro finishing a botched drain connection costs far less than one repairing water damage from a slow putty leak.
Conclusion
Eight ordinary tools and a ring of putty stand between you and a working disposal. The flange seal and the twist-lock do the real work while the knockout plug decides the dishwasher's fate. New circuits belong to electricians and everything else belongs to a free afternoon. This week, check under your sink for an outlet. That one look tells you which version of this project you own.
FAQs
Do I need plumber's putty or silicone?
Putty wins because it seals firmly while staying removable. Silicone turns the next replacement into a scraping session.
What is the knockout plug for?
It seals the dishwasher inlet. Leave it in place when no dishwasher drains through the disposal.
Can one person do the install alone?
Yes, with a prop. A stack of books under the unit holds the weight while you turn the lock ring.
Why does my new disposal leak at the sink?
Uneven flange screws left a thin putty spot. Loosen and retighten in an alternating pattern until putty squeezes out evenly.
Does the disposal need its own breaker?
Many current codes call for a dedicated GFCI-protected circuit. Grandfathered outlets vary, so check locally.
How long should the finished install last?
About 10 years with proper care. The putty seal and mounting ring usually outlive the motor.